- How to Reset Your Password
- How to Add a New User
- How to Add or Change Your Trusted Phone Number
- How to Update Your Account Admin
- How to Vault Your Assyst Credentials in Lender Centre
- How to Access Lender Centre
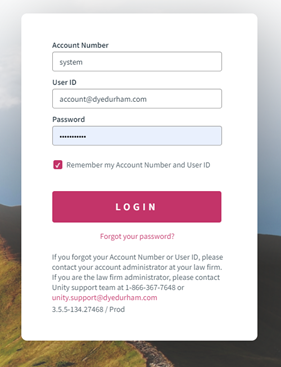
To reset your password, please go here, click “Forgot your Password” and enter the account number (usually 4 numerical digits), user ID and email.

How to Add a New User
The firm Administrator of your Unity® account can create a new staff profile by following these steps:
1. Open Account Administration through the gear button at the top of the Unity® menu bar.Note: The gear icon is only visible to Unity® account Admins.
3. Fill in all required fields
Note: there cannot be a duplicate email address or duplicate initials from an existing profile.
5. Select your firm’s preferred document profile from the dropdown menu and click
6. Your new user will receive an email titled "Welcome to Unity®" with an encrypted link to set up their password and trusted phone number.
How to Add or Change Your Trusted Phone Number
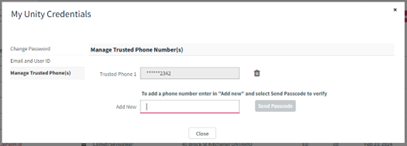
The first time you log into Unity®, you will need to input a trusted phone number. If you need to change this number or add a new trusted phone number, follow these steps:
1. Click on your profile in the top right and select My Unity® Credentials. You will be prompted to input your current Unity® password before moving forward.  2. Select Manage Trusted Phone(s). Enter your updated trusted phone number in the Add New field. Click Send Passcode. A code will be sent to the trusted phone number, and you will be promoted in Unity® to enter this code. Once a new trusted number has been added, you may delete the previous trusted number, if required.

How to Update Your Account Admin
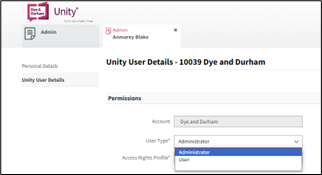
An existing Admin at your firm may add a new or secondary admin by updating the User Type.
1. Open Account Administration through the gear button at the top of the Unity® menu bar.
Note: The gear icon is only visible to Unity® Account Admins.
2. Click on Staff Profiles. Select the user you would like to add as an admin. If the user is not yet set up in Unity®, you must first add them as a new user.

How to Vault Your Assyst Credentials in Lender Centre
1. Hover your mouse over the Lender Centre menu. Click Lender Center.

2. A pop-up window prompting you to either Sign Up for new Lender Centre Credentials or Add Credentials will open. Note: If you were previously sharing login credentials with others at your firm, you are now required to have your own individual login credentials.

a. Click Sign Up to launch the Lender Centre Enrolment Page to begin enrolment for your credentials. This is required for lawyers, notaries and legal assistants.

3. Select Add Credentials to launch the My Integration Credentials pop-up window. This allows you to vault your User Name and Password validation. 
4. Once you have validated, the Success window will pop up – select OK.

How to Access Lender Centre
1. After adding credentials, you can access Lender Centre by hovering your mouse over the waffle menu and selecting Lender Centre.

2. The Unity® Lender Centre page will launch. You can now continue as you did previously through the Assyst Real Estate portal.
Note: There is no change to how your firm is billed or the cost of using Lender Centre following this setup.

Tip: Review the full Unity® Lender Center Guide or watch a brief Unity® Lender Centre Demonstration.
