This article covers how to enter a General Receipt of funds received in the General Bank account to be receipted to a General Ledger account i.e., refund from an insurance refund, capital injection etc.
Two options to access General Receipts:
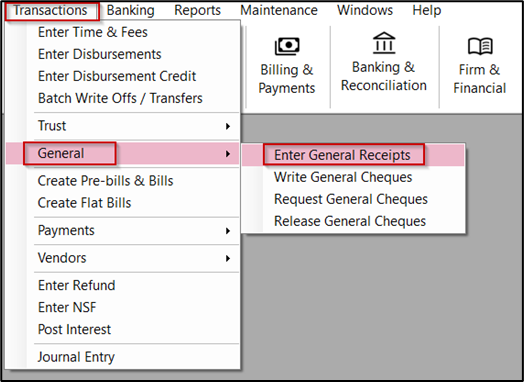
- Click on Transactions – General – Enter General Receipts, or
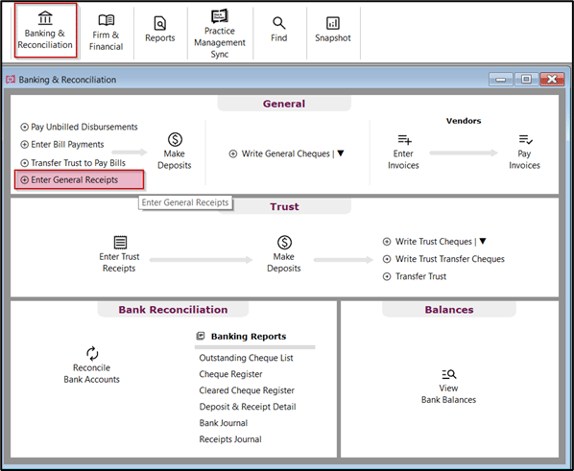
- Click on Banking & Reconciliation – Enter General Receipts
To process Option 1:
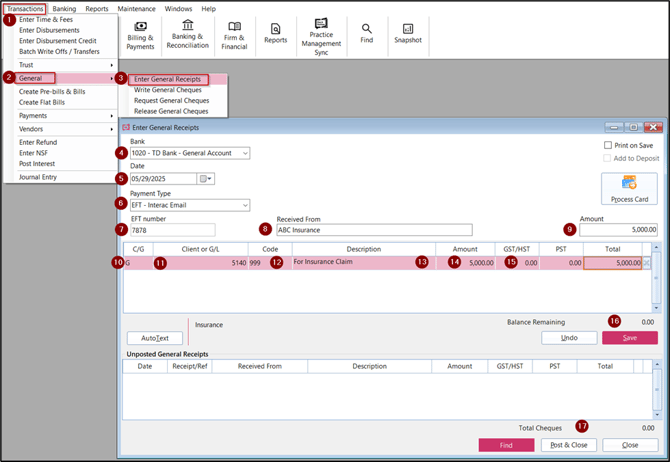
- Click on Transactions
- Click on General
- Select Enter General Receipt
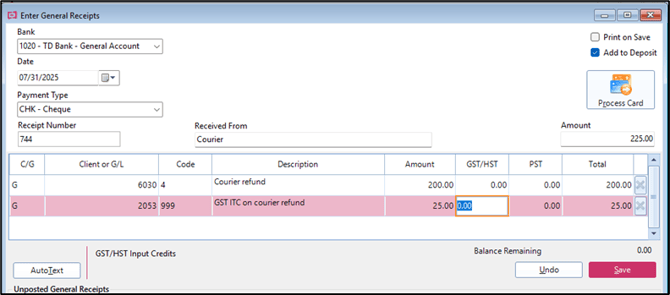
- Bank - Enter or select the general bank
- Date - Enter or select the date of receipt of general bank funds
- Payment Type - Enter or select the payment type i.e. Cheque or EFT. If the payment type is set to add the transaction to the deposit, the Add to Deposit checkbox will be checked.
- Receipt Number - System will automatically show the next receipt number; this can be changed manually if needed.
- Received from - Enter from whom the funds were received from
- Amount - Enter the total amount received
- C/G - Select G
- Client or G/L - Select the General Ledger account to receipt funds to
- Code - Enter or select relevant disbursement code
- Description - Enter the description for the receipt of funds
- Amount - Enter the amount to be receipted to the General Ledger account. If the allocation is to multiple General Ledger accounts enter the allocation amount, or total received for a single General Ledger account
- GST/HST & PST - The amount of GST/HST & PST will always be equal to zero. This is not set by the Code. This cannot be overridden, and an error message will be visible.
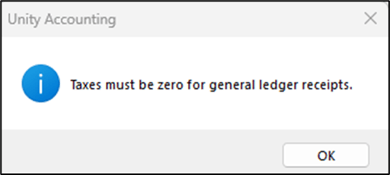
a. If required, as a work around, enter the amount of the transaction to the correct G/L account less the tax in the first line. Tab to the second line and enter the value of the GST/HST directly to the G/L for GST ITC. A warning message will be visible. Select YES. Code equals 999. Description equals GST ITC on ... etc. as appropriate. Enter amount of GST.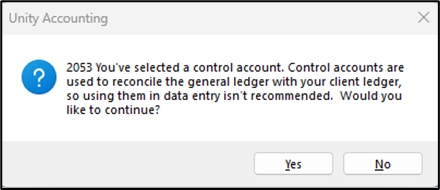
- Click on Save
- Click Post and Close to process the General Receipt
Tips:
- Print on Save on the top right-hand side of the screen to print the receipt at the time of saving the transaction.